Join me, Snow, in my adventures in sewing, quilting, knitting, crocheting - crafting is my lifeblood! Come along, we'll grow in our expertise together.

Saturday, December 20, 2014

Elke in Fleece

10:51 PM Posted by SnowSews
The Elke Dress by My Childhood Treasures is my current favorite dress, this one being my third iteration. I made two in red interlock, one for Miki and one for a friend's daughter. This one I made in a polar fleece I had in my stash for my darling niece. She turns one in January, but is already outgrowing the 18m size in ready to wear. Her chubby cheeks just make me melt!


The Elke is such a chic, classic design. It is well written, and has the option of PDF layers. PDF layers are a new way to just print the size you want from the various sizes offered, and are great for saving ink if you aren't sewing multiple sizes at once. All my favorite designers are now offering PDF layers, and that really makes me want to buy their whole line. Yes, I am a pattern hoarder.

Since this dress is made in fleece, I chose not to finish the sleeves or the hem. Fleece doesn't unravel,
and most importantly I haven't seen my niece to know if the sleeves will be too long for her. This way her mom can simply trim the sleeves to their preferred length.


Isn't the bow darling? It totally makes the dress look très chic! While I am not usually one for over-decorating an outfit, I do think a contrast bow or bit of lace takes an everyday dress to new heights.


Tuesday, December 16, 2014

Sunday, December 14, 2014

Part Two: Quick Tutorial for Skin Retouching with Wavelet Decompose script in GIMP

10:38 AM Posted by SnowSews
This is part two of the Interpreted Tutorial from TheCoffeeShopBlog.com, except that in this tutorial everything I describe is my own work. The original tutorial explains a Photoshop action which cannot be deployed in GIMP, so I found an alternate way to do things.

This segment deals with just skin retouching in Wavelet Decompose, although there are many other ways to do the job. I just liked the control I have over finer details here, giving subtle results and not making her look plastic, which I find is a frequent result when using Gaussian Blur methods. The next segments will deal with eye brightening, whitening whites, teeth whitening, sharpening and adding life to the hair, and boosting and adding vividness to the hair, eyes and lips. These are all steps in the original Photoshop action, but since we don't have access to that, these tutorials will have to do,

Please remember that I am a newbie, and these tutorials are mostly for me, since I tend to forget what I have learned very quickly. If they help anyone else, that's a big bonus.

I downloaded a script called Wavelet Decompose (not the plugin, couldn't figure out how to install that), and saved it in the gimp's scripts directory. Then I restarted GIMP, and could access the script from Image >Wavelet Decompose.

There are many detailed instructions on how to use Wavelet Decompose. The quickest, easiest way that I found was here. I just performed the following steps on the photo I edited in the previous blog post.


What the Wavelet Decompose script does is it splits the main layer into many layers, each with progressively sized details in grey scale, and one residual layer with the color. Each layer will recombine in the Grain Merge layer mode, thus building back up to the final image. If we remove a detail on a particular scale layer, it will be suppressed in the final image. 

I found this method to be particularly effective in removing uneven tone and shadowing from fine hairs on the face. You don't have to worry about what color to pick each time, and possibly painting over the shadows of the face with an inappropriate highlight color - which usually makes the skin look plastic. This method also helps the skin look glowy and fresh, terms often used in advertising makeup. That's a good thing, right?

Here are the steps to quick Skin Retouching:
  • Merge all the layers of the image into one.
  • Go to Image > wavelet decompose, and use the generic settings, at least until you are more comfortable with the choices. The picture is decomposed into layers, each with progressive detail in greyscale, and the last residual layer has most of the color. By hiding the residual layer you can see the actual detail instead of getting lost in the many colors. 
  • Working on the layer with the most visible flaws, using the eye dropper tool, pick a color of grey that is in the area of the perfect skin. Then using a brush with low hardness and the chosen foreground color, paint over the imperfections. 
  • Remember to unhide all the layers and zoom out often, to make sure you haven't erased any important details. If you have, click Ctrl+Z until you undo the mistake.
  • This method also is useful in subtly darkening eyelashes or eyebrows, since by picking a middle layer and a slightly darker grey in the region I want to paint over, I just paint feathery strokes to darken the hair. This will be barely noticeable in this method.
Once you are done, simply flatten the image.

The final image in this example looks glowy and misty, and on closer inspection it looks like I need to sharpen her hair and definitely work on the eyes. I would also probably need to intensify the vividness of the lips and hair and eyes. All these will be tutorials to follow.


Saturday, December 13, 2014

Interpreted tutorial for fixing exposure and remove color cast and to fix blemishes

3:22 PM Posted by SnowSews
Rita, of TheCoffeeShopBlog has a brilliant, free tutorial on fixing exposure and removing color casts from a free photo of a lovely little model. Go see her tutorial here. I don't have Photoshop, which her tutorial is written for, but with a little patience and a lot of Google, I translated her Photoshop tutorial into GIMP. There are many differences between Photoshop and GIMP, the main one being that there are no actions in GIMP. In Photoshop, there are predefined, user created actions that are available (tons for free on TheCoffeeShopBlog) that perform complex tasks for you. I will be investigating how to translate those actions into GIMP as well, in the following tutorials.


From TheCoffeeShopBlog, I will be quoting her tutorial, and then giving succinct directions for GIMP. I do not take credit for anything written in italics, it's all Rita's hard work. 

Here is the before picture, found on Pixabay


"1.  Fix Exposure:  There are many ways to adjust the exposure of an image, and today I will show you how I do it using a level's adjustment layer.  As you can see from the screen capture above, I added some shadow (black slider), lightened the mid tones (gray slider), and brightened the highlights (white slider). 

Moving the sliders under the start of the curve on the left and right will usually add a nice boost of contrast to your image. Then move the middle slide to the left to lighten the mid tones and to the right to darken the mid tones.  This has to be adjusted for each image."

GIMP: Colors > Levels> Channel: Value, adjust the three input sliders to get desired effect

" 2. Remove Color Cast:  After adjusting the contrast I could really see that this image has too much red and yellow.  If you can't easily tell what color cast you are dealing with but know the image is "off", it is easy to play around with a level's adjustment layer until you get a nice skin tone. 

I added a new level's adjustment layer on top and selected "Blue" from the pull-down menubar.  If you add blue you remove yellow (you don't have to trust me on this one, play with the sliders to convince yourself).  I removed some of the yellow from the mid tones by  moving the middle (gray) slider to the right.  I also added a bit of blue to the shadows (black slider)."
GIMP: Duplicate previous layer, the one with exposure fixed. GIMP does not have adjustment layers.
On the new layer, select Colors > Levels > Channel: Blue as above.

"I used the same level's adjustment layer and selected "Red" in the pull-down menubar.  I removed some red from the mid tones (moved the middle slider toward the right).  Now I see a bit of green tint.  Argggh."

GIMP: Same dialog, Channel: Red, move middle slider to right.

"I selected "Green" and moved the middle slider a tiny bit to the right to reduce the green in the mid tones, and then added a tiny bit of green to the shadows.  Just eyeball these settings as you make the adjustments.

There is still a bit of red tint that is irritating me.  I know this seems like a lot of adjustments, but it only takes a minute or two at the most. "

GIMP:  Same dialog, Channel: Green, middle slider to right

"I selected the "Red" again and moved the middle slider from 0.84 down to 0.75 to reduce the reds in the mid tones.  Now I am pretty happy with the skin tone colors. At least for now.  ;-)"

GIMP:  Same dialog, Channel: Red, middle slider moved if necessary.

"This is something you will have to experiment with on your own images to get that perfect skin tone color.  Don't be afraid to play around with the sliders under the curve.  And make sure your monitor is calibrated."

"3.  Fix Blemishes:  There are many ways to fix blemishes on portraits, but I wanted to show you my favorite "quick and dirty way" to do it.

As you can see in the screen capture above, this adorable girl has a scratch under her right eye and a bit of skin discoloration under her left eye. 

Flatten your image after adjusting the exposure and color, and make a new layer over the background.  Use the eyedropper tool (I) (set to 3x3) and click on an area of clean skin around the reddish area.  Then select your brush (B) set at 0% Hardness and 20-30% opacity and click on the discolored areas until you remove them.

If you add too much skin tone paint you can erase it from the new layer and start over.  I often find this "painting" method works better than the patch or clone tools.  Don't worry too much about preserving all of the detailed skin tone as we are going to soften the skin some in the next tutorial."

GIMP: Layers: Merge down, duplicate layer. Select eye dropper tool (shortcut O), click on clean skin area. Select brush (shortcut P), set hardness to 0% and opacity to 30%. Paint over blemish in zoomed mode. This looks amazing.

This is my final image after following her tutorial in Gimp as described.


Friday, December 12, 2014

GIMP High Pass tutorial using FX Foundry

10:05 PM Posted by SnowSews
Here's a before and after using this tutorial, and the referenced photo. Followed most of the steps, and the high pass filter I used was a part of the brilliant FX Foundry pack, since GIMP doesn't have one of its own. Mine is a little different from the final photo in the tutorial, but that is only to be expected.

Original                                                    My Take


Steps to get this effect:

  • Open the photo
  • Duplicate layer. Go to FX Foundry > Photo > Sharpen > EG High-Pass Filter Sharpen. Radius of 5 pixels, Change the Blend mode of the layer to Hard Light.
  • Repeat above with another duplicate layer
  • Flatten all layers into one. Go into Colors > Levels and change up the shadows and highlights and midtone contrast till the image looks good.
The original tutorial is not for GIMP, which is why I have written down my take on the tute. I need to remember,. to never forget.


GIMP: Increase vividness of photos

12:13 PM Posted by SnowSews
Often, I find my point-and-shoot nikon camera takes less than stellar photos. No doubt it is because I am not a skilled photographer, but hey, isn't that what post processing is for? While I can't fix a horrible photo yet, I can definitely increase the vividness of the picture, breathing some much needed life into it so that I can judge whether it's worth working on.

I picked a photo I took a long time ago, just testing out my camera. It's pretty basic and rough. There's a lot that I could do with the photo, but for now, here it is.


The steps to accomplishing this are:
  • Open photo as layers.
  • Layers window > Create duplicate layer
  • Set new duplicate mode to OVERLAY
And that is it, the photo is more vivid. Easy as pie! I think I would do this step after color correcting an image, but it completely depends on the photo and the effect you want to achieve.

Photo Editing with GIMP for modeled photos

11:19 AM Posted by SnowSews
In my previous posts, I mentioned that I was looking to take better photographs. What is a better photo, you ask? In my opinion, a photo that shows great details of the subject, while putting the background where it belongs (in the background), is a better photo. In the context of modeled dresses, the eye should be drawn to the dress first, then the model, and the background should only register as a complement to the dress. I would look for light, bright and arresting photos. No dullness, no shadows on the subject.

Now, I know what I am looking for, but I don't yet know how to take that photo. Here's a great example, from tutugirl.com. I really like that there are light and dark areas in the photo, the background doesn't compete with the details of the dress, and the model's face is well lit without being overblown.


I have a simple point and shoot, and no budget for a dslr in the near future. I used to take jewelry photos a while ago, but photographing a child is not easy, especially not one as excited to see the photo as mine is. She wants the camera in her hand all the time. So what should I do? The answer is simple. GIMP.

GIMP is a free, open source, powerful program with tons of tutorials all over the internet. The only problem is that it takes a long time to learn what effect you want, since the technical terms are so, well, technical. What on earth is a layer mask, anyway?

I have decided that I want to take the time to learn to improve my photos, and that means learning all those complicated words and the actions behind them. I will be posting tutorials as I go, more for me than anyone else, since these will be a record for future use. Wish me luck!

Sunday, December 7, 2014

Jennuine Design's LOL Swing Top in Christmassy prints

11:00 AM Posted by SnowSews
A light, summery swing top in glittery Christmas fabric, is there any better way to make sure I reach for this dress all year round? For Christmas this year Miki will wear this cute top with leggings and a thermal undershirt, and maybe bloomers if I can swing them. When we visit India next year, I plan to have Miki wear the top just with bloomers so she can be cool. India is the land of glitz, and she'll fit right in.

First look at the top:


This is the back, I really like the contrast back and red bias tape edging.


This is the front, simple and eye-catching.

Wednesday, December 3, 2014

Tester photos and review: HeidiandFinn's Bubble Dress!

10:49 AM Posted by SnowSews
Heidi and Finn  just re-released their super chic Bubble Dress, for which I was a tester. The dress, with FULL sizes, 12m-12y, is on sale for only $5 until Sunday, 12/7/14! It is only available in their craftsy store. Run to buy the pattern here!

Here are Miki's photos - I just love how delicate and girly she looks.

The crown did not stay on long. 


The dress is fully lined, quilting cotton on the outside and broadcloth on the inside. I did mine mostly with the sewing machine, just serged the edges before I sewed. I was very, very careful to stick to the seam allowance mentioned. Coz, ya know, that's important when you test.


The dress fits so well. There are two options, a slim fit or a regular fit. Miki is skinny and tall, so I made the slim fit. There was plenty of room for the onesie underneath.


Miki has just started walking, and now it's impossible to stop her from running around and getting into things!


My curious little kitten. Sticking her fingers where they don't belong. I love her so much. 

The directions for sewing the dress are super simple, and even a beginner can attempt the pattern with great success, It's a great special occasion dress in fancy fabrics, and has much oomph with little effort.

Wednesday, November 19, 2014

Tester Bliss!

10:23 AM Posted by SnowSews
After my lamenting about not being asked to test a couple of patterns, I got accepted to test THREE patterns! Two for Miki and one gorgeous one for me.

The designers are pretty amazing, accepting our suggestions and helping us along. I am starting to understand just how hard it is to be a designer, having to be open to criticism. I don't think I will ever have that kind of courage. 

The patterns haven't been released yet, which is why I haven't put up any photos. But let me tell you, Miki looks incredibly cute in the photographs. 

Until then, here are our holiday photos to tide you over. Happy holidays!


Tuesday, November 18, 2014

A Cute Leopard Print Outfit!

10:47 PM Posted by SnowSews
I have been sewing Miki some new outfits, mostly making tunics and leggings. I love sewing Love Notions' free pattern, Leggins. I always make the yoga waistband, since we cloth diaper and Miki needs the extra room. The tunic was a variation on the ever popular Bimaa, where I shortened the sleeves and lengthened the body. I also added a little pink ruffle by cutting off the top of my old tshirt that was in the Goodwill pile.


Miki wore this outfit for a sum total of one hour, before she threw up all over it. Good times.


I really like hemming with a twin needle. It's easy and gives great results. 


Far, far too late I discovered I had cut the polkadot fabric in the wrong direction of stretch. So while this pair fits great because it's a four way cotton lycra blend, it does show strain when it's being worn. That should teach me to pay attention!

Serger Love!

10:42 PM Posted by SnowSews
I bought a Brother 1034D in October, and promptly got to exploring the wonderful world of knits. While I still have trouble with slinky ITY knits, on the whole I love how quick and forgiving knits are. As long as you cut on the grain and are careful of the direction of stretch, it's a truly wonderful fabric to work with. In fact, I'm now on the outs with quilting cotton and all the extra steps I must take to sew with it.


I made this tunic from Nap Time Creations' free Raglan Tee Shirt pattern, and only managed a few action shots since she loved it so much. I had a hard time cutting into my Lillestoff that I've been hoarding for so long, but the gorgeous results are so worth it!


Isn't this a great picture of us?


My little baby is walking! I feel old.


Friday, November 7, 2014

Pro Pics!!

5:12 PM Posted by SnowSews
Pro pics are here of my work!! I loved the shoot soooo much!

Pattern for this dress is Create Kids Couture, a mash-up of the CKC Paris and CKC Staceys.


The tutu that I made - crochet band elastic and hand knotted tulle.


Thursday, October 30, 2014

One Hour Baby Leggings

4:06 PM Posted by SnowSews
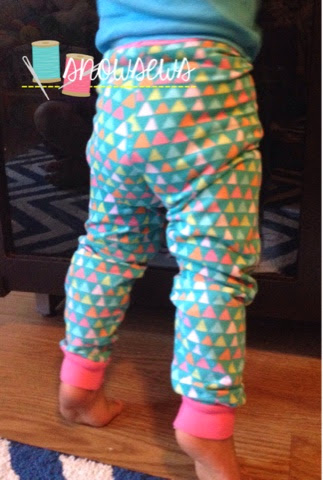
I have been so busy these last few days that the laundry has been languishing, and the dishes piling up. So while I took the time to do the chores, I couldn't resist sewing up a quick and easy pair of leggings for Miki. From cutting to finishing, these took exactly 40 minutes. I know because that's how long she naps.


The pattern is a free one from Melissa Esplin that I had pinned to my board, "Sew For My Toddler" on Pinterest. It's a very simple pattern perfect for a beginner. I serged the seams, using my sewing machine only a couple of times.


I did put my own spin on the leggings, since I had made this pattern before and knew that the cuffs were not as tight as I would like. I used a rib knit tank top that I cut the cuffs from, and because the fabric stretches so much, I cut the cuffs about two thirds as long as the foot opening.  That gave me a very nice, snug fit on the cuffs.


The other modification was the waistband. I had lovely fluorescent pink waistband elastic which I simply zigzagged on to the legging at the end. I could have been much neater, but Miki was waking up and I just needed to be done. She is all kinds of curious right now, and unerringly manages to find pins on the carpeted floor of my sewing room. I really cannot sew with her around yet.


These leggings look absolutely adorable on Miki! The only things I would change next time are a more roomy hip, and a longer waistband elastic. The hip needs room because we do cloth diapers and the legging is quite snug with the diaper on. It also seems a little too tight at the waist, and I might actually rip out the elastic and put in a new, longer one, just so we get a lot more use out of it. The length could easily last her a year or more, but since she is crawling around and getting her knees super dirty, I doubt this pair will endure too much abuse from the washing machine.


All in all, a gorgeous, fast pair of new baby leggings!


Finished: Dress for Miki's First Birthday

9:17 AM Posted by SnowSews , ,
Et Voila! Presenting the tiny dress that drove me so very crazy with its cuteness!


The dress is a pattern mash-up of Create Kids Couture's Paris bodice, and Stacy skirt. 


Five tiers of ruffles in five different fabrics.


Single shoulder bodice with a satin fabric flower accent.


And double cased elastic back. 

I will be reviewing the two patterns I used in a later post. I just wanted to share my joy! She's going to wear the dress on the 8th of November, and I'll get action shots then. It's really short because of all the ruffles, and she looks like a little cake topper in it! She will have to wear tights underneath, since it's quite cold here.

Wednesday, October 29, 2014

Thoughts on Being a Tester

2:57 PM Posted by SnowSews ,
I've recently applied to be a pattern tester for a few designers, which I really doubt I will be chosen for. My photo skills are rusty, since photographing jewelry is totally different from great clothing pictures with a very unwilling and fast model like Miki. My sewing skills are quite good but again, no real proof since I haven't got photo proof. Catch-22, huh?

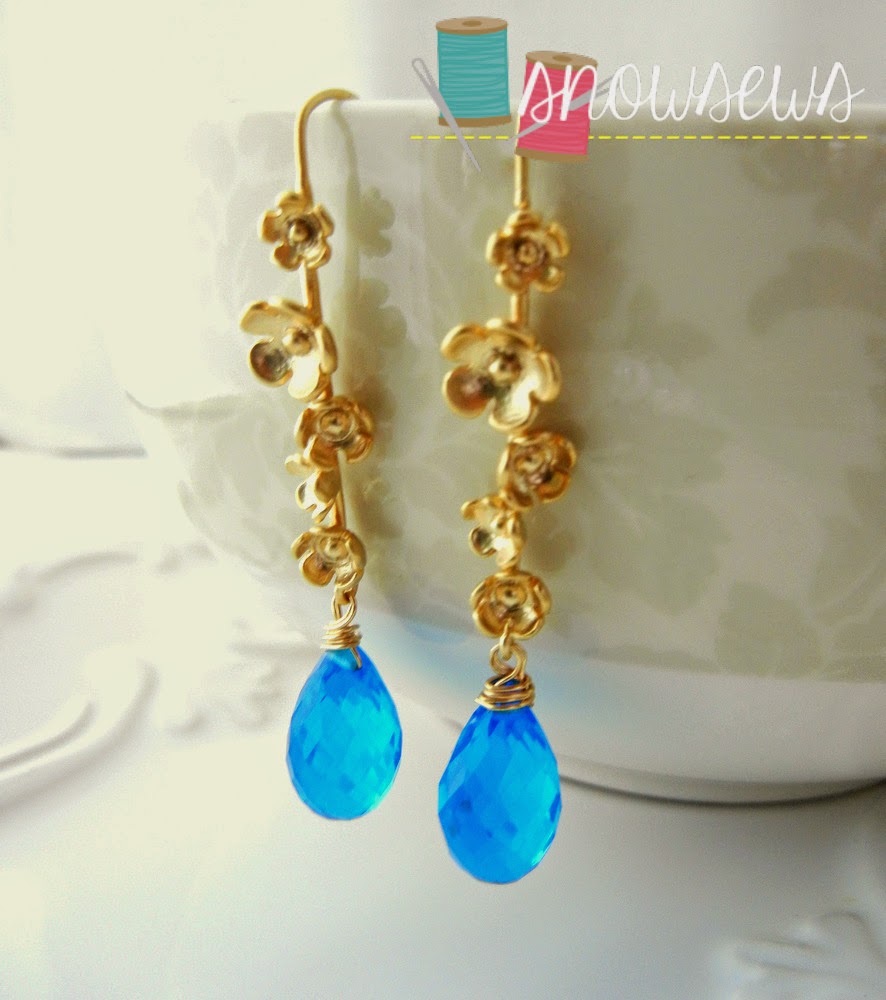
But ya know what? I'm really, really good at photographing jewelry. See?


These are photos from my etsy jewelry store, which I moved on from when I had Miki. I still have some inventory, though, I should probably start wearing it now!

In the meantime, here are a couple of fabric combinations I want to plan for in the next few weeks. Yay! But seriously, please send me good vibes that I get a pattern testing gig as soon as possible!! I really want to collaborate with designers and be a part of this fabulous world, not just a spectator.

Both sets of fabrics are from Hobby Lobby.